| April 2024 | | Sun | Mon | Tue | Wed | Thu | Fri | Sat |
|---|
| | 1 | 2 | 3 | 4 | 5 | 6 | | 7 | 8 | 9 | 10 | 11 | 12 | 13 | | 14 | 15 | 16 | 17 | 18 | 19 | 20 | | 21 | 22 | 23 | 24 | 25 | 26 | 27 | | 28 | 29 | 30 | | | | |  Calendar Calendar |
|
| | | Tachout's Build Thread |  |
| | |
| Author | Message |
|---|
Tachout
Noob


Posts : 95
Join date : 2011-11-30
Age : 59
Location : Sandy Utah
| | Subject: Tachout's Build Thread Sat Dec 03, 2011 12:08 pm | |
| I thought since I am now going to be posting over here, it would not hurt to share my build thread. If you know me from any other site, such as UMCA or what ever then I am sure you have seen this. Either way I am going to pull the build thread over here too, with pics, and then will update this one as I go along.
I am going to pull the build thread over without editing it. Might have some updated material. Lots of things change as I go along. | |
| | | | Tachout
Noob
Posts : 95
Join date : 2011-11-30
Age : 59
Location : Sandy Utah
| | Subject: Re: Tachout's Build Thread Sat Dec 03, 2011 12:49 pm | |
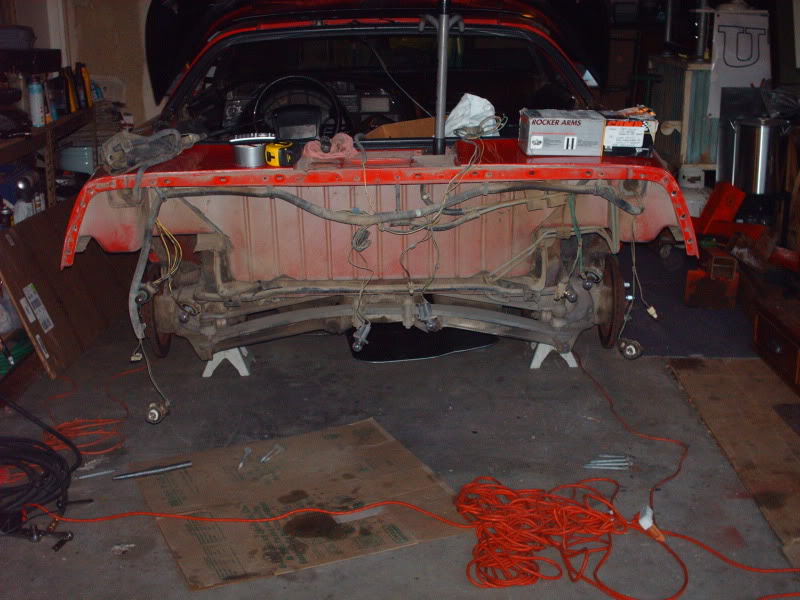
| Well I guess it is time to start this. Not a bad time either since this is the first time since I got it, that I got this deep in. I bought this POS for $5500.  Not a month after getting it, I was offered a Job here in Utah and the trec to here began. I got here, and basically drove it around and found out all the little things I had to fix just to get plates on it, and make it run for a daily driver. I made it through the first winter ok  Then I met Vince (Highpockets) and he invited me out to a Test and Tune at RMR and I got hooked on Racing it. I sold my Harley to buy some parts and a trailer. I got a NOS set up for it but never put it on, I got the roller rockers that are on it now, and got some other parts. Also got a real back window. Funny thing about that back window. Have had it on there for like 6 months now, and have decided to go back to that funny looking thing. First I can take out the little back window for air, and second it weighs like 15 pounds where that glass window weighs like 75 pounds.  As things progressed I did some racing at the track and the waterpump sprung a leak. I resealed the waterpump and put in a new timing chain (mine was just starting to rub the cover) I did run at one more event, but then while putting in way to many hours at work, on my way home from work one night I heard the rods starting to knock. Ok now we are up to where we are now. Pulled the hood off  Yes I know on this you do not have to pull the hood, but it is going to make it a ton easier to work on. Then I got it in the air, and started to tear it down in the car. 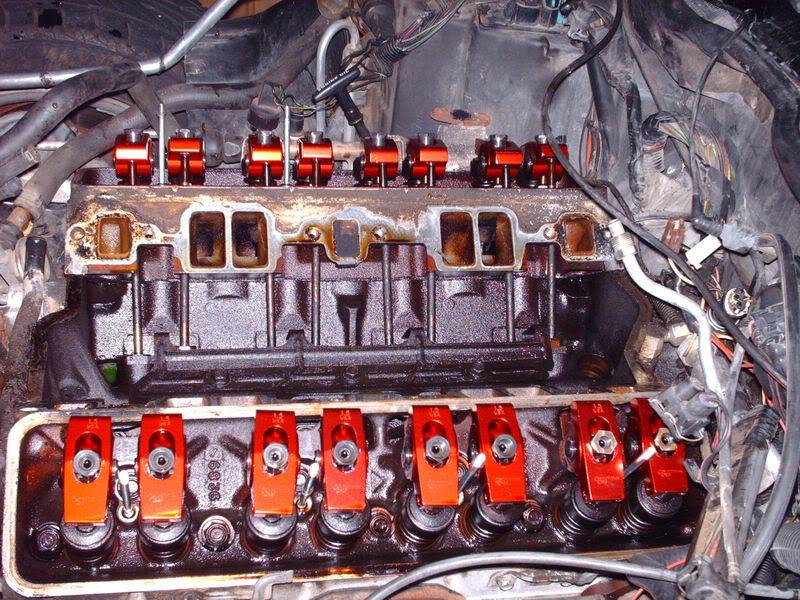 Now I need to go underneath and just unhook the exhaust, and undo the bottom end. Pull the heads (Because I want the off) and it should be ready to come out. I plan to pull the engine and trans at the same time. Plan for now is to rebuild the trans, rebuild the engine from a stock L98 350 to maybe a 383 and go from there. I have started to gather parts, and by this weekend, I plan on having the car ready to go to where I am pulling out the slug. Once out, I will be doing a ton of cleaning, and putting this car on a diet as well. Last year, she ran some good 15.5 runs and had a couple down near 15.1. My first runs this season I want to see quite a bit faster, and we will see where it ends up. I plan on updating this as I go. Wish me luck | |
| | | | Tachout
Noob
Posts : 95
Join date : 2011-11-30
Age : 59
Location : Sandy Utah
| | Subject: Re: Tachout's Build Thread Sat Dec 03, 2011 12:58 pm | |
| Well I got out there today, and got a ton more done. Thanks to a buddy up the street who helped me with the exhaust (It was one piece from were it bolted to the manifolds, to the back exhaust tips) I now have the exhaust sitting up on some boxes out of the way. I have the bottom end close, and have the heads off. Tomorrow I plan on pulling the started, and doing one last check for wires, and loading it on the trailer. Once I get it loaded, it is going down to Highpockets shop for the rest of the removal, and then the final teardown will begin. Once out, I plan on cleaning my whole underhood area. I am going to do some serious detail work, and also plan on sitting down and deciding how far I am going to go, and what I want to do, and make my shoping list. Once I decide what has to be new, I will pull that off the list, and anything I can get used I will put a looking for thread on here. Here are some pictures from today:    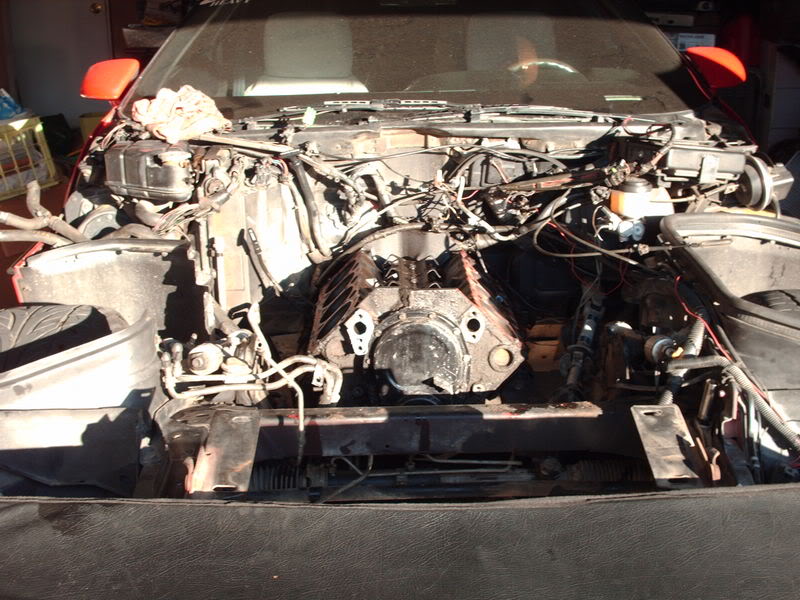   As you can see it is not in too bad a shape. Should be able to use the block, and heads if I want. Does not look like it needs more than just a little hot tank time, and typical machine work! | |
| | | | Tachout
Noob
Posts : 95
Join date : 2011-11-30
Age : 59
Location : Sandy Utah
| | Subject: Re: Tachout's Build Thread Sat Dec 03, 2011 1:00 pm | |
| Well it is on the trailer, and ready to head down to Highpockets shop to be pulled out. I am very excited!   Quick update.... Today took the Vette down to Vinces shop (Highpockets) and with his and Snowmans help, we finished the rest of the unbolting, and pulled out the engine, and trans, and then steam cleaned both the car and the parts, and reloaded it on the trailer. I am going to now push it in the garage, and start the rest of the cleaning, and saving for the parts. Once I have a parts list ready, and know for sure what I am going to do (Which includes looking to see what I can really afford) I will update where the assembly is going. | |
| | | | Tachout
Noob
Posts : 95
Join date : 2011-11-30
Age : 59
Location : Sandy Utah
| | Subject: Re: Tachout's Build Thread Sat Dec 03, 2011 1:06 pm | |
| Well I got the engine up on a stand this past weekend, and then pulled the pan. Here is what I found under the pan and all. No sludge, but black as can be. If you look there are some small specks of metal in it thought. I can attest by the slivers in my hands and all over the bottom end it is ugly as can be in there, and when I pull the caps off I bet the bearings are junk in all the rods, and the mains will be close behind. With it being a 2-bolt block, that is why I have decided to find a 4 bolt block or buy a new block that is 4-bolt mains.  This is the honey colored bottom end. Yep it is a 2-Bolt Block.  This is what it looks like in the area under the timing cover.  And this is what the Cam Bearing looks like  This is the oil pickup, oil baffle, and all.  And this is the Junk Cam. If I run my finger along the cam profile there is a very very noticable dip right before it goes up the lobe, the top of the lobe has some wear, and then on the downside you can feel a bumpy wear pattern. I have had a few smallblocks apart, and have not seen a cam worn like this. Odd wear pattern.  | |
| | | | Tachout
Noob
Posts : 95
Join date : 2011-11-30
Age : 59
Location : Sandy Utah
| | Subject: Re: Tachout's Build Thread Sat Dec 03, 2011 1:06 pm | |
| Ok as I am cleaning up the firewall, and wiring and underhood in preperation for the new engine, and knowing my AC system is junk, I am going to go in and do an AC Delete on the Vette. I am going to take before pics, during pics, step by step how I did it, and what it takes to do it materials wise. Mine has to be done, and I think a lot of this I can do this weekend around all the other projects going on, and will help me to get ready for the Engine that will soon join this car. I am at work right now, but you can see how much I really feel like concentrating. I am planing this out, gathering materials and all. I will do the write up slowly as it is going to take some time, but feel free to follow along and see the progress. I will be cleaning up the firewall area, and then when I get the engine in, I will also be showing how I make my AC Delete Pulley, (Unless I find a deal on one) so that I can use a modified Stock Bracket, as well as the stock tensioner. I am not going to do a Air Pump delete as yes I do plan on putting that back on. It is a street car first and formost so I do plan on it passing smog.
Stay Tuned! | |
| | | | Tachout
Noob
Posts : 95
Join date : 2011-11-30
Age : 59
Location : Sandy Utah
| | Subject: Re: Tachout's Build Thread Sat Dec 03, 2011 1:10 pm | |
| Here are some pics of the Before, and what I am starting with. There will be more pictures as I work on it this coming 4 day weekend.   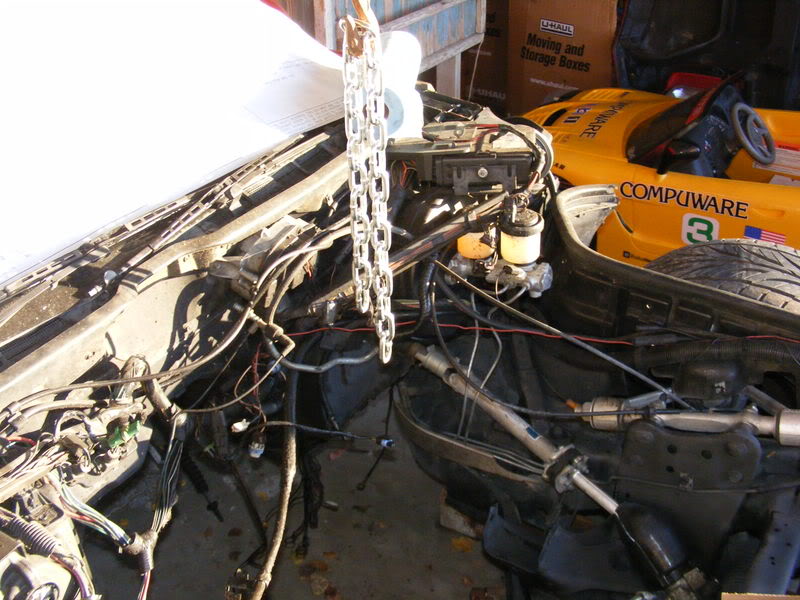 And if your wondering how I am going to wire the DFI in look at the pic on the windshield. Sure is a ton easier if you take the PDF and blow it up on the big printer at work.  | |
| | | | Tachout
Noob
Posts : 95
Join date : 2011-11-30
Age : 59
Location : Sandy Utah
| | Subject: Re: Tachout's Build Thread Sat Dec 03, 2011 1:13 pm | |
| Well believe it or not I actually have something to update. The motor will be paid off in 2 weeks and it will get to come home so then the real work begins. In the mean time I thought I would update all on how I plan on cleaning up some of my parts in the garage. Since I sold the Vinyl Cutter this weekend, and I told myself if I sold it I had to get these two items, I finished working on Saturday, ran a couple of errands and then bought myself a couple of cool things for the garage. First I got myself a Parts Washer with some solvents, so I can put parts and and clean them like I am used to being able to do. Onlything I wish it had was a built in light, and the Lid to open further, but those I will fix soon enough.   And then I finally got a Sand Blast Cabinet. Should make surface prep easier right before paint, or powder coating.   Exciting News!!!! I pick up a major portion of my build this weekend! I will take a ton of pictures as soon as I get it home! | |
| | | | Tachout
Noob
Posts : 95
Join date : 2011-11-30
Age : 59
Location : Sandy Utah
| | Subject: Re: Tachout's Build Thread Sat Dec 03, 2011 1:17 pm | |
| I will post more later, and really detailed info too, but a little teaser of what my day was like:        Well it started life as high nickle content 4 bolt main 377 engine. It had 12:1 compression, and was a NOS engine. It looks to me like he was spraying it pretty good. It was less than a season old, and something was wrong with it so he pulled it out and went with another engine. Upon teardown he found out that the Zero Gap Seconds that were in it had a problem. The chrome was peeling off the rings, and that was its issues. What I plan for this beast of an Engine.... Well I am going to take and tear it down. I am going to have the Block opened as far as safe to go, and then make sure all is good, have that crank taken care of and order some pistons for it to be a 9:1 engine. Then I am going to have the rotating assembly balanced. From there it will be assembled with the full studs, and make sure that all is perfect with the oiling system. Once I get all of it together without the intake, I will make the decision to either keep the Tuned port on it, with a set of siamezed runners, and extrude honed base, or go to a Super Ram. Plans for the rest of the engine are to put a Pair of Garrett GT35 turbo's pumping it back to an intercooler and back into the engine. I am going to mount my turbos so the air intake will be between the front of the door, and the front tire on each side. I am going to obviously have to do something with the trans and rearend so soon I will start designing the rear suspension for a 4-Link and straight axle in the rear. The goal is to build the engine for a really decent amout of power, and then boost it with some serious boost. Since this is a 90 it is impossible to tune the computer worth anything, so I have a Gen VII to drop into it, and plan on updating as much of the electronics on this as I can. Since I will be running a Gen VII I am going to plumb it for 3 different shots, as the computer will allow for me to tune them in if I want to put a delay in, or make it progressive or what ever. Honestly I will probably not use it, except on a couple of special occasions though. Mostly I just want to have the Boosted car, with the ability to turn down the boost to next to nothing, as I want this car to still pass smog, and be a street car.... a fast street car, but still a street car. I want the ability to turn up the boost and make the runs on the track, and be able to drive it home if I need to. Since I am going to update the rear end, and will need to do something with rear brakes, I plan on updating the front brakes as well. Also for safety I plan on putting a full cage in, and all the safety requirements to make it legal to run as fast as it is capible of. That is pretty much it. Sometime this week I will update the grocery list of parts, and make some decisions as to what I am going to sell of what is here. I know the carb will go, the intake that came with the motor will go, and so will the MSD Distributor, and crank fire trigger. And a special thanks to Highpockets for the inspiration for this build. | |
| | | | Tachout
Noob
Posts : 95
Join date : 2011-11-30
Age : 59
Location : Sandy Utah
| | Subject: Re: Tachout's Build Thread Sat Dec 03, 2011 1:18 pm | |
| Like I said in the begining, some things will change come the end. This is an updated pic of what it will look like with the Intake and Runners on it.  | |
| | | | Tachout
Noob
Posts : 95
Join date : 2011-11-30
Age : 59
Location : Sandy Utah
| | Subject: Re: Tachout's Build Thread Sat Dec 03, 2011 1:19 pm | |
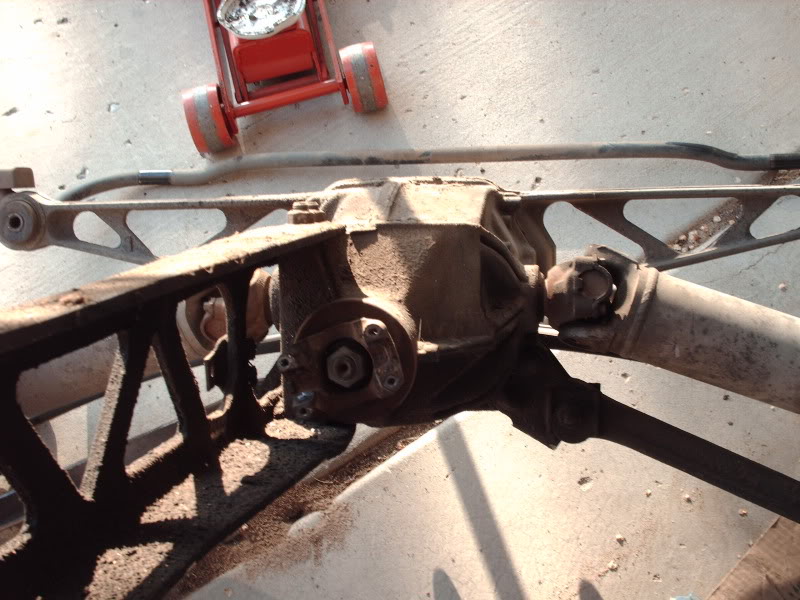
| Well it has been forever since I have been on here. I took a break. I am back and thought I would update everyone on what I am doing with my car. Wanna see one of my favorite pictures?  Well I guess I will update everyone about how the Build is going.... Bad news, things have gotten out of hand, and I decided to pull the trigger and do it up. Here is a pic of the engine that is going in: I got it paid for and home now. There is going to be a pause on the engine as I decided to do a couple of other things to the car, so I did not want gaskets to dry out, and oil to settle in places that I did not want it to settle in and bearings to dry and all, because I am going to be some time till I get back to the Engine Bay. I am going to start at the back of the car. Right now, I am taking a break, but am in the process of pulling off the back of the car and gutting the interior. I am also going to pull the full back suspension out. Here is what is going to be part of the rear suspension:  Yes I know the front brakets are on upside down, but it was just finger tighted together last night. Wanted to shot a pic of it and see what it looked like together. I have a narrowed Ford 9" rear on the way, and have a set of Coil over 3 way adjustable Drag shots for the rear of this. I also have the Narrowed frame rails on the way and a 12 point cage planned for the car. I will be putting in the cage, and doing this up to full Safety specs. Once I get that done, I have a deal working out for the TH400 trans that will go in with my beast. I am still planing on a Pair of GT35R Turbos, Meth Injection and NOS. The Accel DFI will go in, along with a few other electronic goodies. For rear tires I am planning on a pair of 33X21.5 rear tires for street use, and a set of Hoosier Drag Slics for the track. Yes I am going to drive this on the streets, just pull the NOS Bottles, and turn the Boost down and it is about the same as any new C6 you can buy, as far as power, and the other part is to just not act like a kid on the streets and I am good to go. If anyone is interested in it, or wants to hear more feel free to ask. Since I am back now, I will be posting off and on. I will also be posting pics of the tear down, tubbing, and putting in and setting up the 4-Link. I have had a couple people ask me about my interior, and the Carbon Fiber Dash Kit, and I figured before I tore it down all the way I would post a couple pics of it. I am not at all good with a camera, but here is what is in there. The dash area   Door Panels   In tearing down most of the interior, and putting in the cage, I am going to put all the car back together, and get all the dash and gauges hooked up, and finish it off. I have a bad spot on the drivers seat that I am going to get redone. One of the guys at work has a buddy that does that kind of work and does a lot of black leather, and leather like products, so I am going to see if he can repair the seat cover fairly cheap. Other than that, I am going to also try to get some of the same material to recover my Sun Visors as they are in need bad, and the headliner is sagging in the Top. I found a really cool article and think I am going to try to finish it off and while I am at it, I am going to replace all those nasty Rubber seals around the doors, windows, and the top. Plans for the cage are not going to change the fact that I plan on driving it on the streets, so the top still needs to come off, and the rear window will pop open as well for added air. I am going to take the sun shade that is retractable, and make it run up the cage bars to help keep my NOS Cool at the track, but do not plan on ever leaving the bottles in there any other time. I do plan on making sure it has the full stereo and all, but the Air Conditioning is going, because it would cost too much to fix it for what I feel it is worth. Take the top off, pop up that back window, and roll the windows down and it is fine except in traffic, and as close to home and work as I am, not much traffic. Well this package is on its way to me for Friday Delivery. Starting to come along. I call this picture "What did the spider say to the fly?" Doesnt it look like it was wraped by a spider?  Here are the other pictures he sent me right before packaging.   That is a little update. I will try to update this as the 12 point cage goes in, and as I get the back half done, and the rear installed. I am selling the entire rear that is in my Vette if you all know anyone interested. It is complete Rotor to Rotor and I am asking $650.00 | |
| | | | Tachout
Noob
Posts : 95
Join date : 2011-11-30
Age : 59
Location : Sandy Utah
| | Subject: Re: Tachout's Build Thread Sat Dec 03, 2011 1:20 pm | |
| Well Yesterday my New to me Rear End was dropped off. I got out there today to unwrap it.  Must have had 2" of bubble wrap all around it. Great Packaging. Today I got my TH400 Transmission core... I needed it now because the Corvette does not use a Cross Member, or have a Transmission mount. They use that stupid C-Beam, so I decided to pick it up now, and put the Crossmember in when I am doing the cage.  Tomorrow is Field Day around the house as next saturday One of my Daughters and her son (one of my Grand Babbies) will be coming in so I have a ton of work to do around the house. Once I get it done, I am going to try to get some more of the Disassembly completed. Hopefully I can start getting to the cage, and narrowing the frame and all really soon. I will post pics of the progress along the way. | |
| | | | Tachout
Noob
Posts : 95
Join date : 2011-11-30
Age : 59
Location : Sandy Utah
| | Subject: Re: Tachout's Build Thread Sat Dec 03, 2011 1:21 pm | |
| | |
| | | | Tachout
Noob
Posts : 95
Join date : 2011-11-30
Age : 59
Location : Sandy Utah
| | Subject: Re: Tachout's Build Thread Sat Dec 03, 2011 1:22 pm | |
| Well today I spend most of the day with my Daughter Candace who is in the Navy and my Grandson. Today is also my Daugther Jessica's Birthday. Had a nice time, and even made some home made Pizza from Scratch. I was able to make a tiny bit of progress. I got the rear Facia off of the Vette. It is only a few screws here and there, but let me tell you, I want to slap the engineer that decided to put all those bolts so far out of rearch. Anyway it is pulled off and now I can concentrate on getting the interior stripped. She is a shell of her former self, and getting even leaner.     Must say she is looking pretty pathetic right now. I have to still pull a bunch of stuff off of the back including the fuel tank, and a bunch of other stuff. Then I need to spend some time with the interior until it is nothing more of a shell. Then the fun begins. I have tracking numbers, and the Back Half from Competition Engineering should be here along with the cage. Going to be some hectic weeks coming up. Working at D.R. Horton, working at the track with several weeks of two days a week at the track, and working on the car, but I feel in the end it will be worth it. I will keep updating as I go, and will also be doing a set of Tubs on this thing. Once the back half, cage and tubs are done, and the 4-Link is bolted in, I am sure you all will see it starting to come together, but it should be interesting to see some progress shots, as it comes even more apart, and then cut and installed parts. Anyone that is interested in the process, or wants specific shots of anything, feel free to come check it out. | |
| | | | Tachout
Noob
Posts : 95
Join date : 2011-11-30
Age : 59
Location : Sandy Utah
| | | | | Tachout
Noob
Posts : 95
Join date : 2011-11-30
Age : 59
Location : Sandy Utah
| | Subject: Re: Tachout's Build Thread Sat Dec 03, 2011 1:23 pm | |
| | |
| | | | Tachout
Noob
Posts : 95
Join date : 2011-11-30
Age : 59
Location : Sandy Utah
| | Subject: Re: Tachout's Build Thread Sat Dec 03, 2011 1:24 pm | |
| Well seems like almost daily I am going to be able to post pictures of progress or something happening. For today: First this guy stops by:  Says he has some parts for me!  The back half kit:   And my 12-Point Cage Kit: 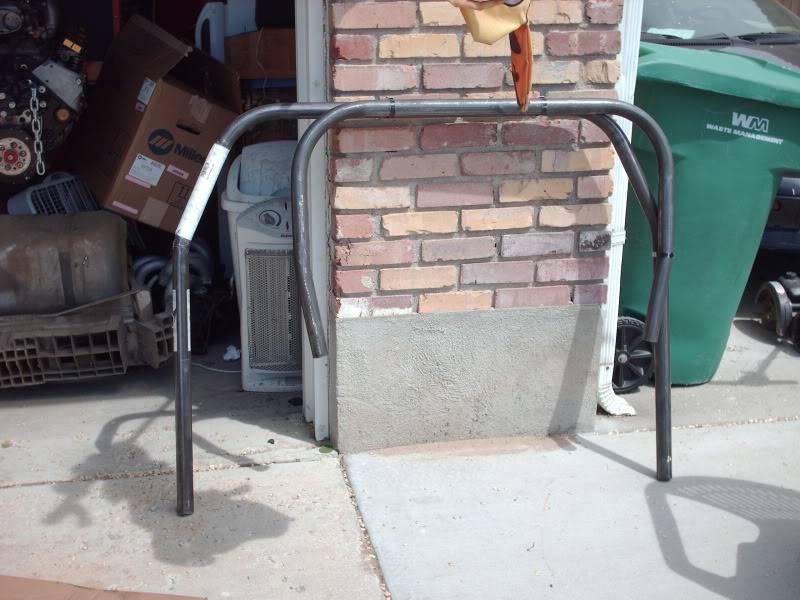   Needless to say that there is going to be some assembly required, but in the end it will be a custom fit. First impressions of the Jegs Cage kits are as follows: 1. Takes forever to get (Like 6 Weeks) 2. Packaging Bites, as the box most of it was in was scattered all over the place 3. I will be doing some cut to fit in most areas. 4. Documentation is weak. By the time I am done, I will probably draw this up in Autocad, and with pictures, have a pretty decent install manual. Just something I am going to do for me. Again, as I progress, if I get to a point where something looks interesting to you, or you want to come see how I did something you are more than welcome to stop by. | |
| | | | Tachout
Noob
Posts : 95
Join date : 2011-11-30
Age : 59
Location : Sandy Utah
| | Subject: Re: Tachout's Build Thread Sat Dec 03, 2011 1:24 pm | |
| | |
| | | | Tachout
Noob
Posts : 95
Join date : 2011-11-30
Age : 59
Location : Sandy Utah
| | Subject: Re: Tachout's Build Thread Sat Dec 03, 2011 1:25 pm | |
| Well it has be like forever since I did any welding. I mean a long time. I decided that practice was in order long before the welder got near the vette so I am working on a small project. I am going to build a base to go under each of my jack stands with 4 casters on each. I saw this on an episode of some 4x4 show on Speed one Saturday morning. Put a piece of angle on each side, and weld a piece of round bar to the end of each so the jack stand can be taken in and out of the frame you built. Then weld on the casters.
Went to Lehi Metal Mart and got the steel for the project. If I screw it up no big deal, just make another right? If I screw up welding on my back half or cage.... OUCH! so I thought this was the way to get back in practice. Well the first one, I cut out the angle and cut out the round bar, and made the first connection. UGLY Very ugly, and had to work on the setting up of the machine for what I was welding. By the time I got to the 4th connection the welds looked ok, but it is still trash. Machine is now set, and I am going to lay out the next one I cut so it will be square and I can make the welds. I am going to prep all 4 of them, and I am going to square them up real good. I am going to clean the metal around the connections real good, and I am going to take pictures along the way. Then I am going to weld them all at once by tacking the 4 pieces together, and doing a little weld on each corner to make sure it is square and the heat does not warp anything. From there I am going to make a couple of small welds in 4 places around the round bar to make sure it is tight. Then weld each joint once it cools. By the time I get the 4th one done, and the 4 casters welded to each of them, I should be ready to start fitting my parts in place on the car. I am still going to take my time, and going to test fit each and every part several times. Then I plan on makeing most of the welds out of the car. I am going to put as much of the cage together as I can outside of the car, and then going to put the majority of it in the car in one piece. Then weld it in, and weld in what is left in the car as I go. Idea is to make sure it all stays square, and that each joint is perfect.
Thought I would share | |
| | | | Tachout
Noob
Posts : 95
Join date : 2011-11-30
Age : 59
Location : Sandy Utah
| | | | | Tachout
Noob
Posts : 95
Join date : 2011-11-30
Age : 59
Location : Sandy Utah
| | Subject: Re: Tachout's Build Thread Sat Dec 03, 2011 1:27 pm | |
| | |
| | | | Tachout
Noob
Posts : 95
Join date : 2011-11-30
Age : 59
Location : Sandy Utah
| | Subject: Re: Tachout's Build Thread Sat Dec 03, 2011 1:29 pm | |
| Thanks for checking in on the build off and on. Kinda cool getting to share what I am doing each time I work on it. I have actually considered taking off a couple days from work and just working on it each day to get the Cage in, but then I would not have those days for later in the summer. Well for the next update I will say I did not get near as far as I wanted to. Now lets talk about the Rear Sub Frame. First remember to measure twice, and cut once..... Well here are the measure twice pictures.      Then I measured and marked the outriggers on the sub frame assembly. Just so everyone knows I do have one major recommedation for you. If you are going to attempt to do all this cutting, get a Sawzall. I have been using a die grinder with a cut off wheel. Cuts the fiberglass like butter, and is perfect for cleanup and all. For the steel cuts my compressor cannot keep up with the die grinder so it takes some time. By the time all is said and done, I am going to have the tools of a small body shop, as well as a major mechanics shop! Yes on payday I will probably go buy a sawsall too. If I use a tool more than twice I probably should buy it, so I do. Makes things easier down the road.       After I cut the subframe it was time to take a break. I did not get back out there till today, and let me tell you, no matter how we twisted it, that frame still would not go in. After some thinking, and looking I called upon someone who has already cut up a couple of these..... Thanks Vince, when I gut the rear crossmember nothing moved! Matter of fact it still hasnt. Anyway as you can imagine, I cut a section out of the rear crossmember so I could slide it in there. A little twisting and pushing and it got in there today.... Well part the way anyway. I cut just outside my lines, and wanted it to be a grind to fit kind of thing. Well it is! I have done some of the grinding, but it was getting late so this is where it is being left for tonight.       I think beyond the Sawzall, I am also going to get a couple of other body tools to grind all the fiberglass out where I need to (As it is glued in with fiberglass resin to the sheet metal I need to weld.) Besides it would make it so much easier to clean up the weld joints of the paint, and all the crap before I weld anyplace. Now the space in my garage is really really limited, so I just shoved stuff back under there and YES I do have a major case of the fiberglass itch. No worries as sooner or later it will all wash out. Anyway The outriggers you see in the pictures will drop down over a 16" and be all the way down to the bottom of the seat pan. I am going to need to do a lot more cleaning in there, as well as grinding out the fiberglass, but as you can see, the outriggers are just a hair too big! That is a good thing. I can just hit them with the grinder and grind them to fit. Not that it is going to be easy, but I would rather it be tight as it can be rather than loose and have to use weld to fill it and hope that it holds with a hard as hell launch. Not me! Anyway once I get the outriggers to fit inbetween the frame rails I will need to level it and square it with the cars frame. Then with a jack on the back end, I need to get the angle set. I can then tack it if I want.... (Which I am not going to do as I do not want it in the way for the next step. From there I need to take my main hoop for my cage, and make a couple bends in the down legs to make it more of a custom fit, and I need to size it to the correct height. I plan on making it really really tight. Then I am going to size and cut to length the rear bars coming down to the shock towers and frame from the hoop. Then I am going to size the halo. I am still not planing on even tacking a thing. From there you will see an art project to end all art projects. I am going to be out there with all of it removed except the rear frame rails and I am going to be cutting and taping posterboard to be pretend wheel wheels (Yep I am tubbing this pig too!) In the coming weeks, I hope that everyone gets the chance to follow along, and if you want to come check it out, and see the progress at any point, or pick my brain as to how I did something, or share with me your insights on a better way, please feel free. Everytime the garage door is open it seems someone driving buy stops to check it out. I really do enjoy it. | |
| | | | Tachout
Noob
Posts : 95
Join date : 2011-11-30
Age : 59
Location : Sandy Utah
| | Subject: Re: Tachout's Build Thread Sat Dec 03, 2011 1:30 pm | |
| Well I had a light day today, and wanted to unwind some so I slept good tonight, so I decided I would go out after dinner and work on the stuff. Well to my surprise my garage door had leaked a small puddle about a 1/4 in deep into my garage under my car, and around all the stuff I left layed out. Had to clean up all of the stuff in the puddle, and then clean up the puddle. Then I put a space heater blowing on the floor and went to let it dry while I had dinner. Very enjoyable, as I got done with dinner, I changed out of my work clothes, and went out to see how bad it was going to be to work in it... IT WAS DRY! Well atleast where I was going to work. I got in there under the car, and ground out what I wanted out, and cleaned up a bit in there. Then I decided to go grind on the ends of that frame to get it into the hole, and read to size and fit for welding. Got it droped in the hole and it is now sitting on the rear cross member that will eventually come out. I can tell that at the end of working on it tonight, that I needed to grind on a couple more spots. Once that is completed, I can push it in to where I need to mark so I can cut out a place for the frame rails to come into the car. Should happen pretty fast, but I have set a 9:00PM Curfue on grinding, and cutting and loud noises because of the neighbors. So far no one has complained and I do not want them to. Slow I know, and I am glad I am not doing this for a living anymore. But then again I am having fun now, so all the more reason not to do it for a living. I can actually enjoy it now. I would say by the end of the weekend depending on how the running, and errands, and breakfast, and all go, I should be out there bending the main hoop, and sizing the halo, and rear shock to hoop bars. Once they are sized, I should be close to ready to remove the rear rails all the way, and start some serious welding. I am going to first cut out what I do not need, and then fill in the wound. From there I am going to tack the rear frame in, and start sizing the sheet metal for the wheel wells. Much easier to size before it is all welded up. Once it has been sized to some extent. Watch for more details as it starts to come together the photos should become more interesting, and rather than just shooting a few shots when I am done, I will shoot some shots during as well. Now for a few pictures of the progress.       | |
| | | | Tachout
Noob
Posts : 95
Join date : 2011-11-30
Age : 59
Location : Sandy Utah
| | Subject: Re: Tachout's Build Thread Sat Dec 03, 2011 1:30 pm | |
| First off the pictures might look a little different tonight. Over the weekend I went out and got a new camera, as my old one was a real POS and I found the one I have been looking for on sale. Now for an update on the car. Well after a couple of days of grinding and cutting and fitting, I finally have that backhalf where I want it pretty much. I am about a 1/8" from where I want it, which is fine until I go to weld it, and then I can tweak it in. Anyway this is pretty close and then I need to go in and set the angles. From here I am going to start to size the hoop, halo and front and rear down tubes. Then I am going to cut out most of the rear frame of the Vette, and start sizing tubs. I hope to get to a point this weekend of sizing tubs. Once that is done, I can tack everything, remove the main assembly and start the finish welds on them. Then I will finish off the cutting of the rear frame, weld the new rear frame in place, and plate over the wounds. Then I will install the main part of the cage, and the wheel wells. Once that is done, I can finish the cage, and be ready for its first Chassis inspection. Once that is complete, I still have a ton of work before I can assemble the interior back in, including some fabrication of the trans cross member, as well as some rear tub interior parts, and the chute mount. Before that is done, I will also need to get a fuel cell, relocate the battery, and make some rear struts to connect the rear facia. I am also planning a belly pan of sorts in the rear to keep the wind out of it that will not be formed or put in until the end, when I got to do the exhaust. I have decided to put the meth tank up front, along with the overflow and the oil tank.     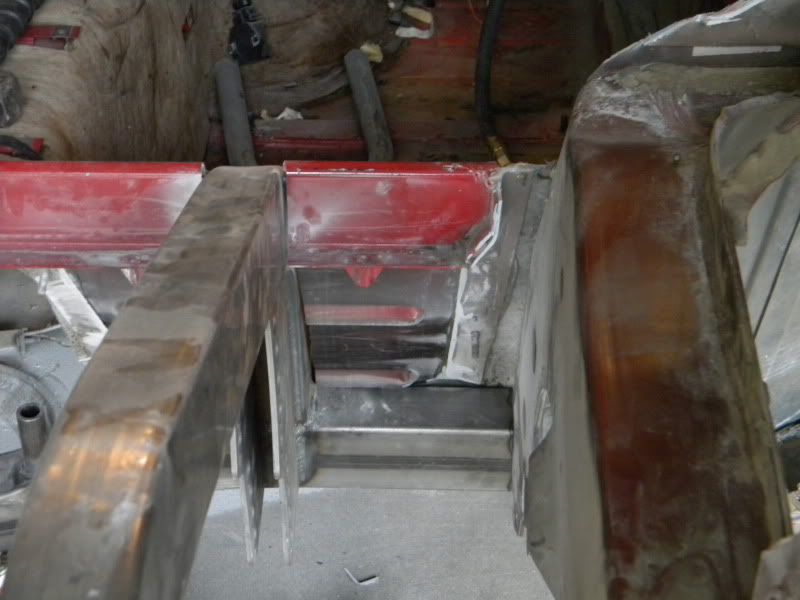     | |
| | | | Tachout
Noob
Posts : 95
Join date : 2011-11-30
Age : 59
Location : Sandy Utah
| | Subject: Re: Tachout's Build Thread Sat Dec 03, 2011 1:31 pm | |
| Well since the activities were canceled tonight at the track, I worked about an hour late, and then came home and made dinner. After dinner I could see that the weather was nice for a tiny bit, and I had a window so I decided to go out and get the bends in my main hoop that I wanted to do. Now all I have to do is trim it to size and it will be ready to go in the car. It will drop down when I size it and that will put it under and behind the main targa bar of the car. Just need to leave room to get the interior trim panels in place, as well as Dynomat, and carpet down on the floor area. Also want to make sure there is room for padding on the cage, as well as a padding cover to make it look nice. I want it to be tight and hard to tell is in the car, but still meet the IHRA and NHRA Rules. Another piece close. Next after the cutting of the main hoop (Hopefully tomorrow) will be to size the down pipes from the main hoop to the shock towers. Would love to have that and the halo done before the end of the day sunday, and maybe a tack or two on those parts to the hoop. Then on sunday if we can buy some sunshine, I want to do the halo to front down tube connection, and the front downtubes sized. If I can get that far, I will need to do a ton of cutting on the rear frame, and then patch the frame holes this weekend.      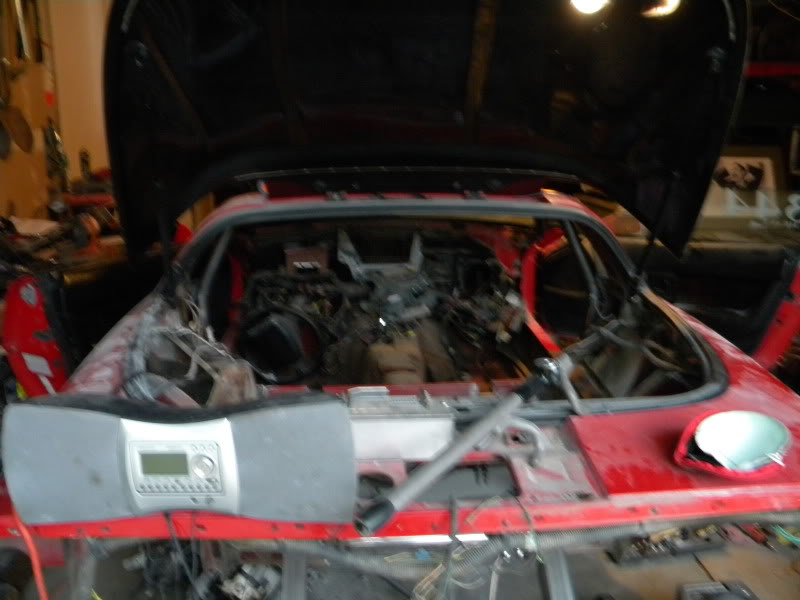  | |
| | | | Sponsored content
| | Subject: Re: Tachout's Build Thread | |
| |
| | | | | | Tachout's Build Thread | |
|
Similar topics | |
|
| | Permissions in this forum: | You cannot reply to topics in this forum
| |
| |
| |